Making Wet Felted Felt Hats...
I often get asked about making Felt Hats, or people tell me they'd like to try their hand at making their own Felt Hat - especially at this time of year when it starts to get colder - so I thought I'd clear up a few unanswered questions and help people on their way to this magical Felt Hat making process!
Firstly, wet felting a felt hat is not dissimilar to wet felting a felt bag. In fact we start off in pretty much the same way with a plastic template - regardless of the 'sort' of hat we want to make.
 The difficult part is choosing which shape to make! The choice in shape depends on whether you'd like to make a Felt Cloche Hat - similar to the above shape, or more of an unstructured hat with folds and a slightly more freeform feel like below!
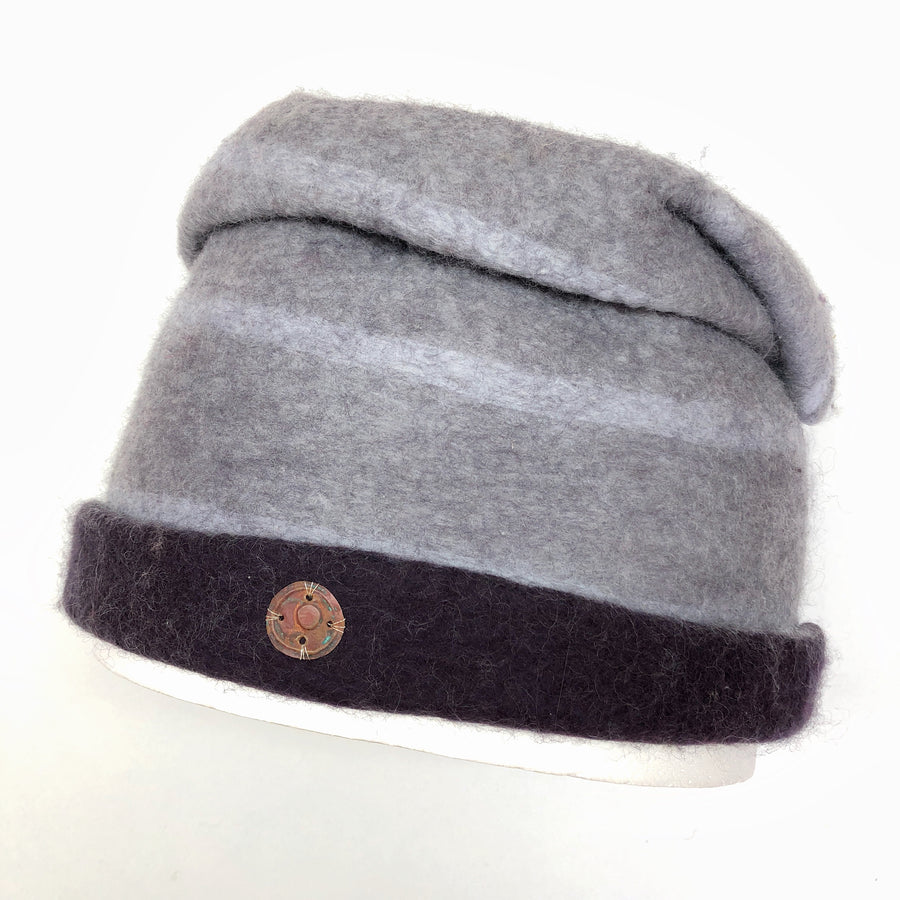
The Cloche shape is more compact so we start with a smaller template. The folded freeform Felt Hat Style calls for a longer template which gives more opportunity for experimenting and folding once it's done!

But : one of THE most important things to do and the main differences between felting a bag and felting a hat, is that you MUST measure your head before you start! :-)
This measurement should be around the widest part of your head, and it is then halved to determine the width of the plastic template, but you must add 20% to it, to allow for shrinkage during the Felting process.
Wool is carefully laid out and layered around the template, which is rubbed with soapy water and soap through netting each time a new layer is added. It is then rubbed more on the outside, with the added design - all made from wool tops! Finally is rinsed and rolled - which is when it shrinks most.
During this final rinsing part of the process you are also rolling your felt hat in a bamboo mat. This is when you need to keep trying your (slightly damp!) felt hat on, to make sure it fits and doesn't get too small.

We usually work the wet felted hats in two layers, - so as you can see there is an 'inside colour' and an 'outside colour' too. This makes them totally reversible as they are seamless, and also gives you the opportunity to fold a brim as well. In the hat above you can see that I've felted in some strands of different colours between the two layers, which stick out the top - really fun on a kids Felt Hat! :-)

As you probably know, we sell the Felting Wool Tops (unpsun wool) needs to make your wet felted hat, in over 70 different colours, - so there's plenty of choice! How much will you need? Well it varies according to the style you've chosen to do, but as a rough guide for an adult hat I'd estimate roughly 3m per colour or layer, so if you bought a bag of 100g in two different colours, that should be sufficient. And then you might want to think about some other colours for your outside decorations too! :-)


Or another option is to make one of our Felt Rose Kits, and then attach that to the outside of your Felt Hat!
To find more detailed instructions on how to make a Felt Hat I'd recommend either :
1) Joining me in my studio for Wet Felting Felt Hat Course / Workshop which I usually run once a year - check out my Felting Courses List for dates!
or if that isn't practical or you don't live near enough to Dorking, then I have a Felt Hat making project in my book called "Complete Feltmaking" below"...

...which is the Felt Cloche picture at the top of this blog post.

We also sell Hat Blocks to help make and finish your cloche hat on to, in four different sizes. The four sizes cover most adult heads, and the smallest 55-56cm size is usually suitable for older kids too.
Happy Felt Hat making! xx